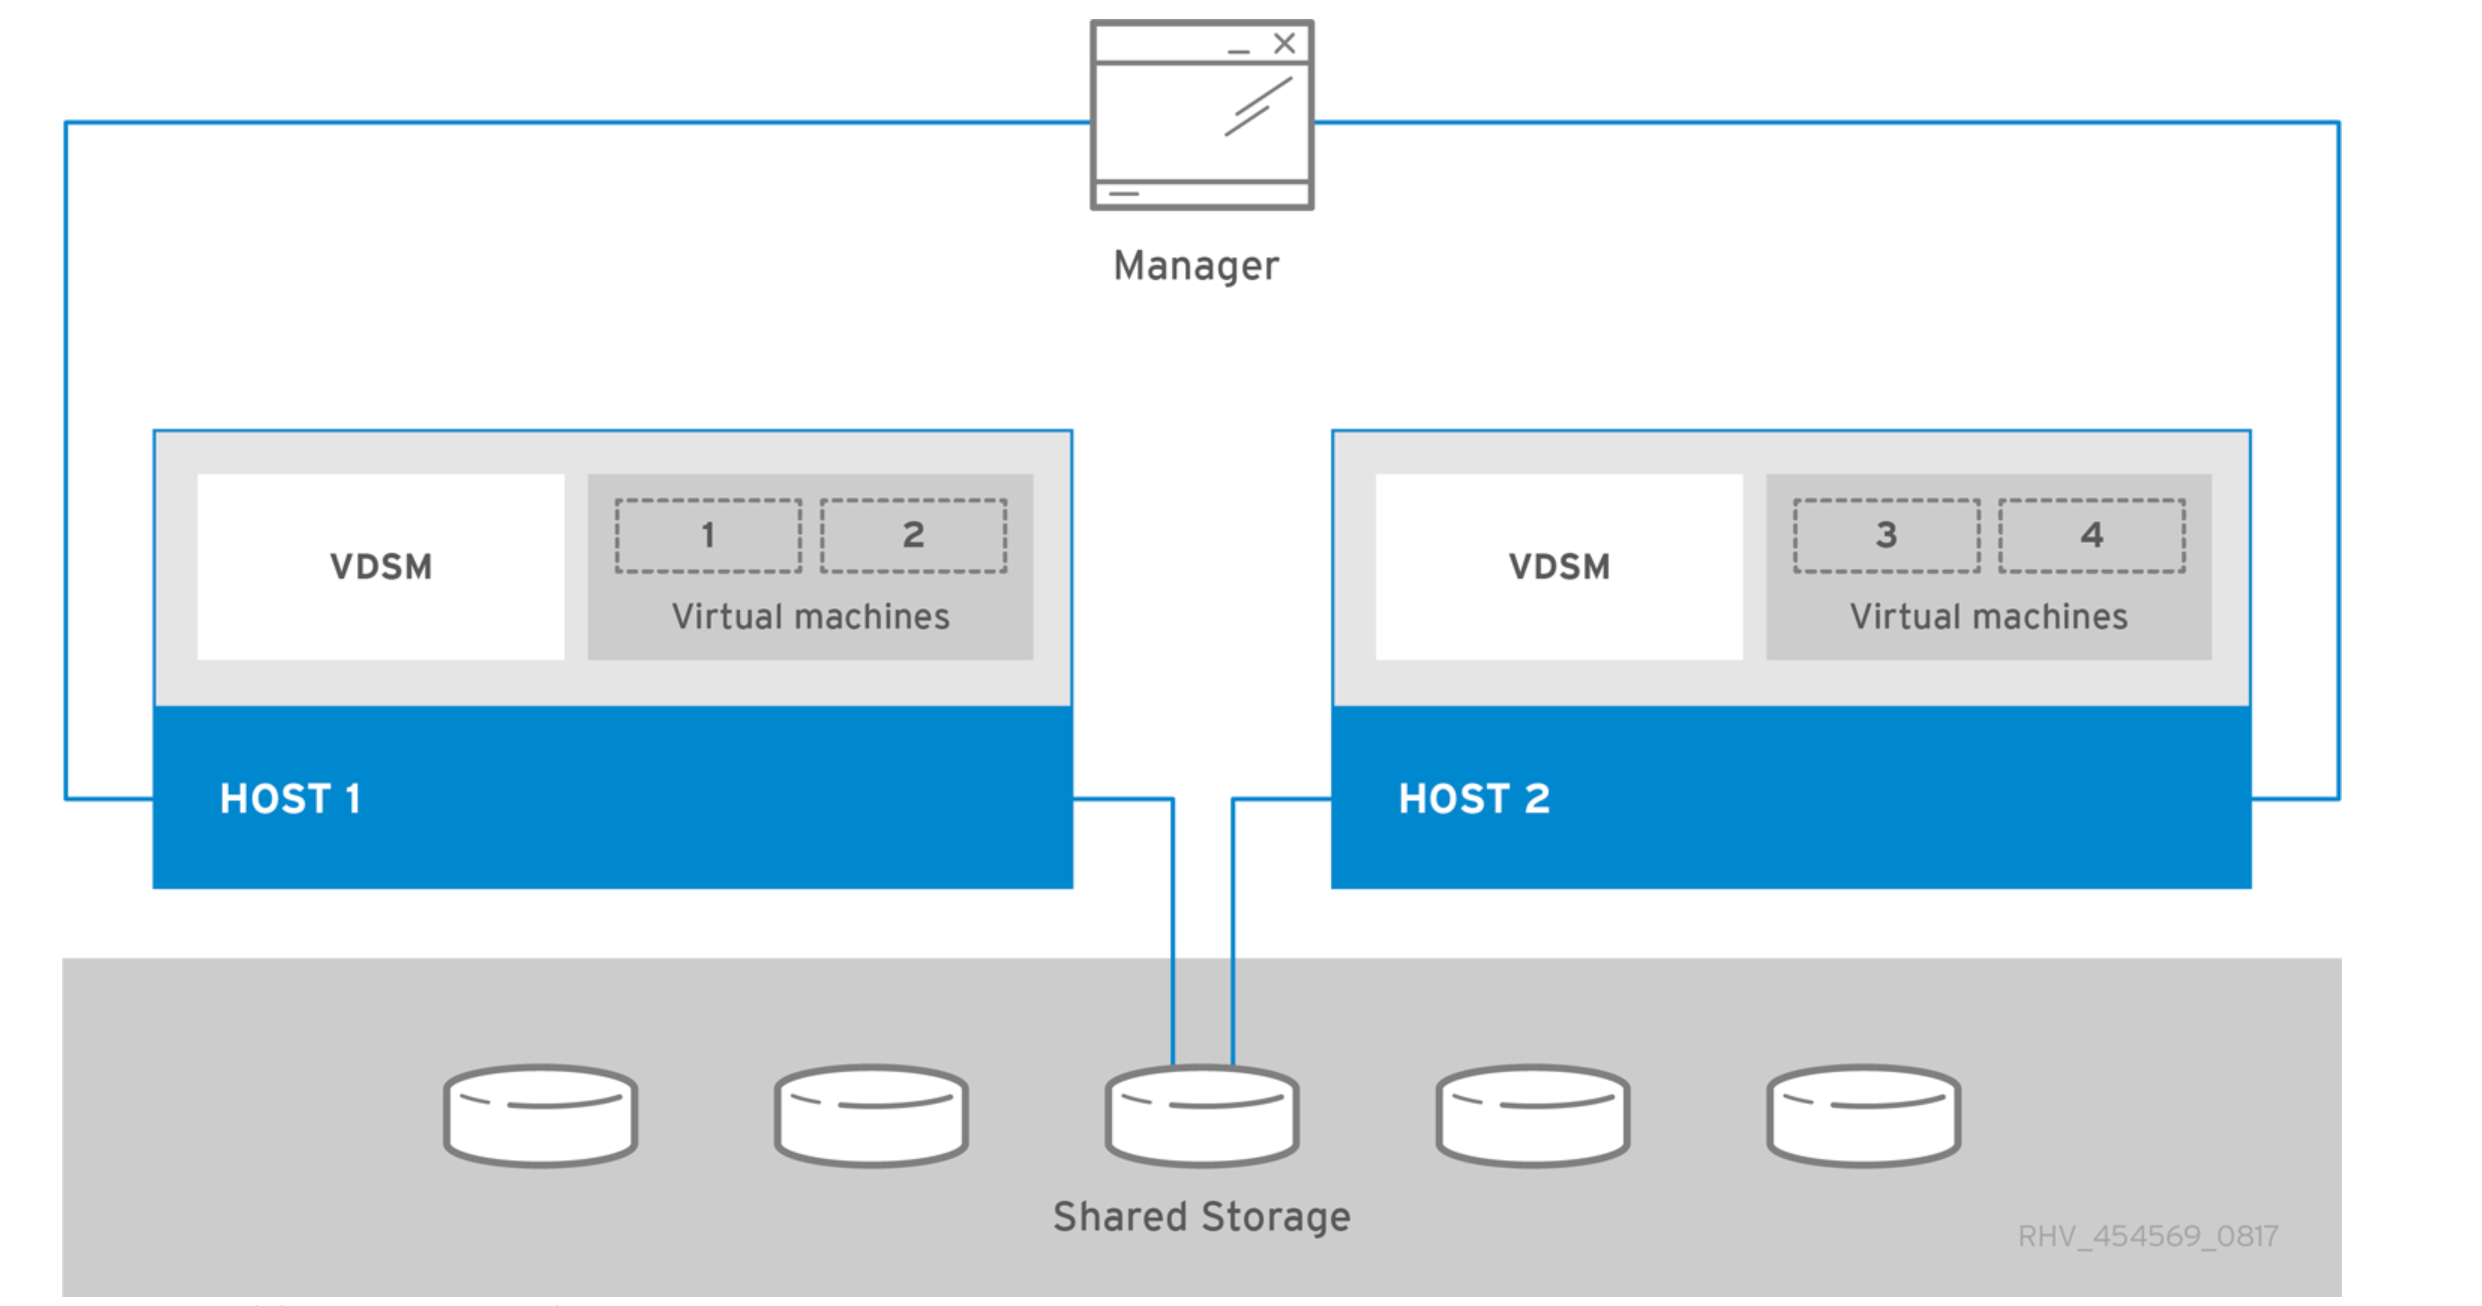
oVirt 是一款免费使用的开源虚拟化管理解决方案,其开发由 Red Hat 支持。 oVirt 是为管理 KVM(基于内核的虚拟机)虚拟化环境而构建的。它附带的功能使您能够通过基于 Web 的集中管理界面来管理存储、网络和虚拟机。
oVirt 项目的关键组件是 oVirt Engine 和 oVirt Node。 oVirt Engine 是一个提供图形用户界面和 REST API 的组件,用于管理虚拟化环境中的所有资源。您可以在运行 Enterprise Linux 的物理机或虚拟机上安装 oVirt Engine。
本文将提供在 CentOS Stream 9/Rocky Linux 9 Linux 系统上手动安装独立 oVirt Engine 的指南。必须在运行名为 engine-setup 的脚本之前安装操作系统,该脚本将执行 oVirt 引擎的配置。设置完成后,您可以添加计算主机并配置用于运行虚拟机的存储。
以下是在独立虚拟机或专用服务器上安装 oVirt Engine 的硬件要求。
| Resource | Minimum | Recommended |
|---|---|---|
| CPU | A dual core x86_64 CPU. | A quad core x86_64 CPU or multiple dual core x86_64 CPUs. |
| Memory | 4 GB of available system RAM if Data Warehouse is not installed and if memory is not being consumed by existing processes. | 16 GB of system RAM. |
| Hard Disk | 25 GB of locally accessible, writable disk space. | 50 GB of locally accessible, writable disk space.You can use the RHV Engine History Database Size Calculator to calculate the appropriate disk space for the Engine history database size. |
| Network Interface | 1 Network Interface Card (NIC) with bandwidth of at least 1 Gbps. | 1 Network Interface Card (NIC) with bandwidth of at least 1 Gbps. |
1. 拉取更新并设置ntp
登录到您的 Linux 服务器实例。
ssh root@ServerIP or username@ServerIP运行以下命令以确保所有系统软件包都是最新的。
sudo dnf -y update应用内核更新时,需要重新启动。
sudo reboot更改当前使用的时区
sudo timedatectl set-timezone your_time_zone要列出所有可用时区,请在 shell 提示符下键入以下内容:
timedatectl list-timezones要将时区更改为非洲/内罗毕,我将输入:
sudo timedatectl set-timezone Africa/Nairobi还可以启用系统时钟与远程服务器的自动同步。
sudo timedatectl set-ntp yes安装 Chrony 时间同步。
sudo dnf -y install chrony
sudo systemctl enable --now chronyd
手动同步时间。
sudo chronyc sources确认您的系统本地时间值。
$ timedatectl
               Local time: Thu 2024-02-08 10:36:19 EAT
           Universal time: Thu 2024-02-08 07:36:19 UTC
                 RTC time: Thu 2024-02-08 07:36:19
                Time zone: Africa/Nairobi (EAT, +0300)
System clock synchronized: yes
              NTP service: active
          RTC in local TZ: no
2.添加oVirt引擎RPM存储库
让我们启用包含 oVirt Engine 包的正确存储库。
sudo dnf install -y centos-release-ovirt45预期安装输出:
...
Dependencies resolved.
======================================================================================================================================================================================================
....

Transaction Summary
======================================================================================================================================================================================================
Install  12 Packages

Total download size: 105 k
Installed size: 37 k
Downloading Packages:
对于 Rocky Linux 9,更新存储库配置文件以将 $stream 替换为 9-stream。这将使我们能够在 Rocky Linux 9 系统上使用 CentOS Stream 9 存储库。
for repo in oVirt-4.5 Storage-common OpenStack-yoga Messaging-rabbitmq NFV-OpenvSwitch Ceph-Pacific Gluster-10 OpsTools; do
 sudo sed -i 's/$stream/9-stream/' /etc/yum.repos.d/CentOS-$repo.repo
done
列出系统上当前启用的存储库。
$ sudo dnf repolist
repo id                                                                                repo name
appstream                                                                              CentOS Stream 9 - AppStream
baseos                                                                                 CentOS Stream 9 - BaseOS
centos-ceph-pacific                                                                    CentOS-9-stream - Ceph Pacific
centos-gluster10                                                                       CentOS-9-stream - Gluster 10
centos-nfv-openvswitch                                                                 CentOS Stream 9 - NFV OpenvSwitch
centos-openstack-yoga                                                                  CentOS-9 - OpenStack yoga
centos-opstools                                                                        CentOS Stream 9 - OpsTools - collectd
centos-ovirt45                                                                         CentOS Stream 9 - oVirt 4.5
centos-rabbitmq-38                                                                     CentOS-9 - RabbitMQ 38
crb                                                                                    CentOS Stream 9 - CRB
extras-common                                                                          CentOS Stream 9 - Extras packages
ovirt-45-upstream                                                                      oVirt upstream for CentOS Stream 9 - oVirt 4.5
resilientstorage                                                                       CentOS Stream 9 - ResilientStorage
更新缓存元数据。
sudo dnf makecache -y3.安装oVirt引擎
为机器设置正确的主机名。
sudo hostnamectl set-hostname ovirt.mylab.io将 IP 及其主机名添加到 /etc/hosts 文件中。
$ sudo vim /etc/hosts
ovirt.mylab.io 192.168.1.8
现在我们已经配置了所需的存储库,让我们安装 oVirt 引擎的软件包和依赖项。
sudo dnf install ovirt-engine当提示继续时接受安装。
....
Transaction Summary
======================================================================================================================================================================================================
Install  687 Packages

Total download size: 845 M
Installed size: 2.6 G
Is this ok [y/N]: y
在安装过程中按照指导导入所有 GPG 密钥。
...
------------------------------------------------------------------------------------------------------------------------------------------------------------------------------------------------------
Total                                                                                                                                                                  28 MB/s | 845 MB     00:30
CentOS Stream 9 - NFV OpenvSwitch                                                                                                                                     1.0 MB/s | 1.0 kB     00:00
Importing GPG key 0x9D2A76A7:
 Userid     : "CentOS NFV SIG (https://wiki.centos.org/SpecialInterestGroup/NFV) <[email >"
 Fingerprint: 3515 4228 1749 01BE FA8E 69A6 2146 5E28 9D2A 76A7
 From       : /etc/pki/rpm-gpg/RPM-GPG-KEY-CentOS-SIG-NFV
Is this ok [y/N]: y
Key imported successfully
CentOS-9 - OpenStack yoga                                                                                                                                             1.0 MB/s | 1.0 kB     00:00
Importing GPG key 0x764429E6:
 Userid     : "CentOS Cloud SIG (http://wiki.centos.org/SpecialInterestGroup/Cloud) <[email >"
 Fingerprint: 736A F511 6D9C 40E2 AF6B 074B F9B9 FEE7 7644 29E6
 From       : /etc/pki/rpm-gpg/RPM-GPG-KEY-CentOS-SIG-Cloud
Is this ok [y/N]: y
Key imported successfully
CentOS Stream 9 - OpsTools - collectd                                                                                                                                 622 kB/s | 1.0 kB     00:00
Importing GPG key 0x51BC2A13:
 Userid     : "CentOS OpsTools SIG (https://wiki.centos.org/SpecialInterestGroup/OpsTools) <[email >"
 Fingerprint: 7872 8176 9AD7 3878 85EE A649 4FD9 5327 51BC 2A13
 From       : /etc/pki/rpm-gpg/RPM-GPG-KEY-CentOS-SIG-OpsTools
Is this ok [y/N]: y
Key imported successfully
CentOS Stream 9 - oVirt 4.5                                                                                                                                           1.0 MB/s | 1.0 kB     00:00
Importing GPG key 0x61E8806C:
 Userid     : "CentOS Virtualization SIG (http://wiki.centos.org/SpecialInterestGroup/Virtualization) <[email >"
 Fingerprint: A7C8 E761 309D 2F1C 92C5 0B62 7AEB BE82 61E8 806C
 From       : /etc/pki/rpm-gpg/RPM-GPG-KEY-CentOS-SIG-Virtualization
Is this ok [y/N]: y
Key imported successfully
oVirt upstream for CentOS Stream 9 - oVirt 4.5                                                                                                                        1.2 MB/s | 1.6 kB     00:00
Importing GPG key 0x24901D0C:
 Userid     : "oVirt <[email >"
 Fingerprint: 3C98 E81D B93D EA6D 54DE 690E 44E4 75CB 2490 1D0C
 From       : /etc/pki/rpm-gpg/RPM-GPG-KEY-oVirt-4.5
Is this ok [y/N]: y
使用 rpm 命令查询软件包详细信息,确认安装成功。
$ rpm -qi ovirt-engine
Name        : ovirt-engine
Version     : 4.5.5
Release     : 1.el9
Architecture: noarch
Install Date: Thu 08 Feb 2024 09:49:46 AM EAT
Group       : Virtualization/Management
Size        : 39491334
License     : ASL 2.0
Signature   : RSA/SHA256, Fri 01 Dec 2023 12:12:24 PM EAT, Key ID 7aebbe8261e8806c
Source RPM  : ovirt-engine-4.5.5-1.el9.src.rpm
Build Date  : Fri 01 Dec 2023 11:01:32 AM EAT
Build Host  : x86-03.mbox.rdu2.centos.org
Packager    : CBS <[email >
Vendor      : CentOS Community Build Service
URL         : http://www.ovirt.org
...
4.配置oVirt引擎
要配置 oVirt Engine,我们需要运行 engine-setup 命令:
sudo engine-setup初始化立即开始。
[ INFO  ] Stage: Initializing
[ INFO  ] Stage: Environment setup
          Configuration files: /etc/ovirt-engine-setup.conf.d/10-packaging-jboss.conf, /etc/ovirt-engine-setup.conf.d/10-packaging.conf
          Log file: /var/log/ovirt-engine/setup/ovirt-engine-setup-20240208065045-1nrdhj.log
          Version: otopi-1.10.4 (otopi-1.10.4-1.el9)
[ INFO  ] Stage: Environment packages setup
[ INFO  ] Stage: Programs detection
[ INFO  ] Stage: Environment setup (late)
[ INFO  ] Stage: Environment customization
...
配置部署 oVirt Engine 所需的关键选项。
          --== PRODUCT OPTIONS ==--
          Configure Cinderlib integration (Currently in tech preview) (Yes, No) [No]:Yes
          Configure Engine on this host (Yes, No) [Yes]:Yes

          Configuring ovirt-provider-ovn also sets the Default cluster's default network provider to ovirt-provider-ovn.
          Non-Default clusters may be configured with an OVN after installation.
          Configure ovirt-provider-ovn (Yes, No) [Yes]:<Enter>
          Configure WebSocket Proxy on this host (Yes, No) [Yes]:<Enter>

          * Please note * : Data Warehouse is required for the engine.
          If you choose to not configure it on this host, you have to configure
          it on a remote host, and then configure the engine on this host so
          that it can access the database of the remote Data Warehouse host.
          Configure Data Warehouse on this host (Yes, No) [Yes]:<Enter>

          * Please note * : Keycloak is now deprecating AAA/JDBC authentication module.
          It is highly recommended to install Keycloak based authentication.
          Configure Keycloak on this host (Yes, No) [Yes]:<Enter>
          Configure VM Console Proxy on this host (Yes, No) [Yes]:<Enter>
          Configure Grafana on this host (Yes, No) [Yes]:<Enter>
它将检查是否有可用的更新。
          --== PACKAGES ==--

[ INFO  ] Checking for product updates...
[ INFO  ] No product updates found
在网络配置下确认主机名或设置一个新主机名。
--== NETWORK CONFIGURATION ==--

          Host fully qualified DNS name of this server [ovirt.mylab.io]: ovirt.mylab.io
数据库定制有很多选项。使用适合您用途的东西。在这里我们将使用所有默认值。
 --== DATABASE CONFIGURATION ==--

          Where is the DWH database located? (Local, Remote) [Local]:<Enter>

          Setup can configure the local postgresql server automatically for the DWH to run. This may conflict with existing applications.
          Would you like Setup to automatically configure postgresql and create DWH database, or prefer to perform that manually? (Automatic, Manual) [Automatic]:<Enter>

          Where is the Keycloak database located? (Local, Remote) [Local]:<Enter>

          Setup can configure the local postgresql server automatically for the Keycloak to run. This may conflict with existing applications.
          Would you like Setup to automatically configure postgresql and create Keycloak database, or prefer to perform that manually? (Automatic, Manual) [Automatic]:<Enter>
          Where is the ovirt cinderlib database located? (Local, Remote) [Local]:<Enter>
          Setup can configure the local postgresql server automatically for the CinderLib to run. This may conflict with existing applications.
          Would you like Setup to automatically configure postgresql and create CinderLib database, or prefer to perform that manually? (Automatic, Manual) [Automatic]:<Enter>
          Where is the Engine database located? (Local, Remote) [Local]:<Enter>

          Setup can configure the local postgresql server automatically for the engine to run. This may conflict with existing applications.
          Would you like Setup to automatically configure postgresql and create Engine database, or prefer to perform that manually? (Automatic, Manual) [Automatic]:<Enter>
设置引擎管理员用户密码。
--== OVIRT ENGINE CONFIGURATION ==--

          Engine admin password:<Set-New-Password>
          Confirm engine admin password:<Confirm-New-Password>
          Application mode (Virt, Gluster, Both) [Both]:<Enter>
          Use Engine admin password as initial keycloak admin password (Yes, No) [Yes]:<Enter>
通过剩余选项的设置值完成。
 --== STORAGE CONFIGURATION ==--

          Default SAN wipe after delete (Yes, No) [No]:<Enter>
  --== PKI CONFIGURATION ==--

          Organization name for certificate [mylab.io]:<Enter>

 --== APACHE CONFIGURATION ==--

          Setup can configure the default page of the web server to present the application home page. This may conflict with existing applications.
          Do you wish to set the application as the default page of the web server? (Yes, No) [Yes]:<Enter>

 --== SYSTEM CONFIGURATION ==--


          --== MISC CONFIGURATION ==--

          Please choose Data Warehouse sampling scale:
          (1) Basic
          (2) Full
          (1, 2)[1]:<Enter>
          Use Engine admin password as initial Grafana admin password (Yes, No) [Yes]:<Enter>

          --== END OF CONFIGURATION ==--
最后,您将获得包含所有配置集的输出。
 --== CONFIGURATION PREVIEW ==--

          Application mode                        : both
          Default SAN wipe after delete           : False
          Host FQDN                               : ovirt.mylab.io
          Update Firewall                         : False
          CinderLib database host                 : localhost
          CinderLib database port                 : 5432
          CinderLib database secured connection   : False
          CinderLib database host name validation : False
          CinderLib database name                 : ovirt_cinderlib
          CinderLib database user name            : ovirt_cinderlib
          Set up Cinderlib integration            : True
          Configure local CinderLib database      : True
          Configure local Engine database         : True
          Set application as default page         : True
          Configure Apache SSL                    : True
          Keycloak installation                   : True
          Engine database host                    : localhost
          Engine database port                    : 5432
          Engine database secured connection      : False
          Engine database host name validation    : False
          Engine database name                    : engine
          Engine database user name               : engine
          Engine installation                     : True
          PKI organization                        : mylab.io
          Set up ovirt-provider-ovn               : True
          DWH installation                        : True
          DWH database host                       : localhost
          DWH database port                       : 5432
          DWH database secured connection         : False
          DWH database host name validation       : False
          DWH database name                       : ovirt_engine_history
          Configure local DWH database            : True
          Grafana integration                     : True
          Grafana database user name              : ovirt_engine_history_grafana
          Keycloak database host                  : localhost
          Keycloak database port                  : 5432
          Keycloak database secured connection    : False
          Keycloak database host name validation  : False
          Keycloak database name                  : ovirt_engine_keycloak
          Keycloak database user name             : ovirt_engine_keycloak
          Configure local Keycloak database       : True
          Configure VMConsole Proxy               : True
          Configure WebSocket Proxy               : True
只需按
Please confirm installation settings (OK, Cancel) [OK]:等待配置过程完成
[ INFO  ] Stage: Transaction setup
[ INFO  ] Stopping engine service
[ INFO  ] Stopping ovirt-fence-kdump-listener service
[ INFO  ] Stopping dwh service
[ INFO  ] Stopping vmconsole-proxy service
[ INFO  ] Stopping websocket-proxy service
[ INFO  ] Stage: Misc configuration (early)
[ INFO  ] Stage: Package installation
[ INFO  ] Stage: Misc configuration
[ INFO  ] Initializing PostgreSQL
[ INFO  ] Creating PostgreSQL 'ovirt_cinderlib' database
[ INFO  ] Configuring PostgreSQL
[ INFO  ] Upgrading CA
[ INFO  ] Creating PostgreSQL 'engine' database
[ INFO  ] Configuring PostgreSQL
[ INFO  ] Creating PostgreSQL 'ovirt_engine_history' database
[ INFO  ] Configuring PostgreSQL
[ INFO  ] Creating PostgreSQL 'ovirt_engine_keycloak' database
[ INFO  ] Configuring PostgreSQL
[ INFO  ] Creating CA: /etc/pki/ovirt-engine/ca.pem
[ INFO  ] Creating CA: /etc/pki/ovirt-engine/qemu-ca.pem
[ INFO  ] Creating a user for Grafana
[ INFO  ] Allowing ovirt_engine_history_grafana to read data on ovirt_engine_history
[ INFO  ] Setting up ovirt-vmconsole proxy helper PKI artifacts
[ INFO  ] Setting up ovirt-vmconsole SSH PKI artifacts
[ INFO  ] Configuring WebSocket Proxy
[ INFO  ] Creating/refreshing Engine database schema
成功安装结束摘要报告将打印在屏幕上。
          --== END OF SUMMARY ==--

[ INFO  ] Restarting httpd
[ INFO  ] Start with setting up Keycloak for Ovirt Engine
[ INFO  ] Done with setting up Keycloak for Ovirt Engine
[ INFO  ] Stage: Clean up
          Log file is located at /var/log/ovirt-engine/setup/ovirt-engine-setup-20240208065045-1nrdhj.log
[ INFO  ] Generating answer file '/var/lib/ovirt-engine/setup/answers/20240208070615-setup.conf'
[ INFO  ] Stage: Pre-termination
[ INFO  ] Stage: Termination
[ INFO  ] Execution of setup completed successfully
engine-setup 还将显示有关如何访问您的环境的详细信息。
5. 配置firewalld
您可以安装并激活firewalld以确保您的服务安全。
sudo dnf -y install firewalld
sudo systemctl enable --now firewalld
复制定义了 oVirt Engine 所需端口的 xml 文件。
sudo cp /etc/ovirt-engine/firewalld/* /etc/firewalld/services重新加载firewalld规则。
sudo firewall-cmd --reload在firewalld 中允许其他oVirt 服务。
for service in ovn-central-firewall-service ovirt-provider-ovn ovirt-http \
  ovirt-https ovirt-vmconsole-proxy  ovirt-websocket-proxy \
  ovirt-fence-kdump-listener ovirt-imageio-proxy ovirt-postgres; do
sudo firewall-cmd --permanent --add-service $service;
done
重新加载并确认它们是否已添加到允许列表中。
sudo firewall-cmd --reload
sudo firewall-cmd --list-all
6. 访问oVirt引擎Web界面
用于设置主机名的 FQDN 值应在您的 DNS 服务器中具有 A 记录。或者,在本地工作站 /etc/hosts 文件中创建一条记录。
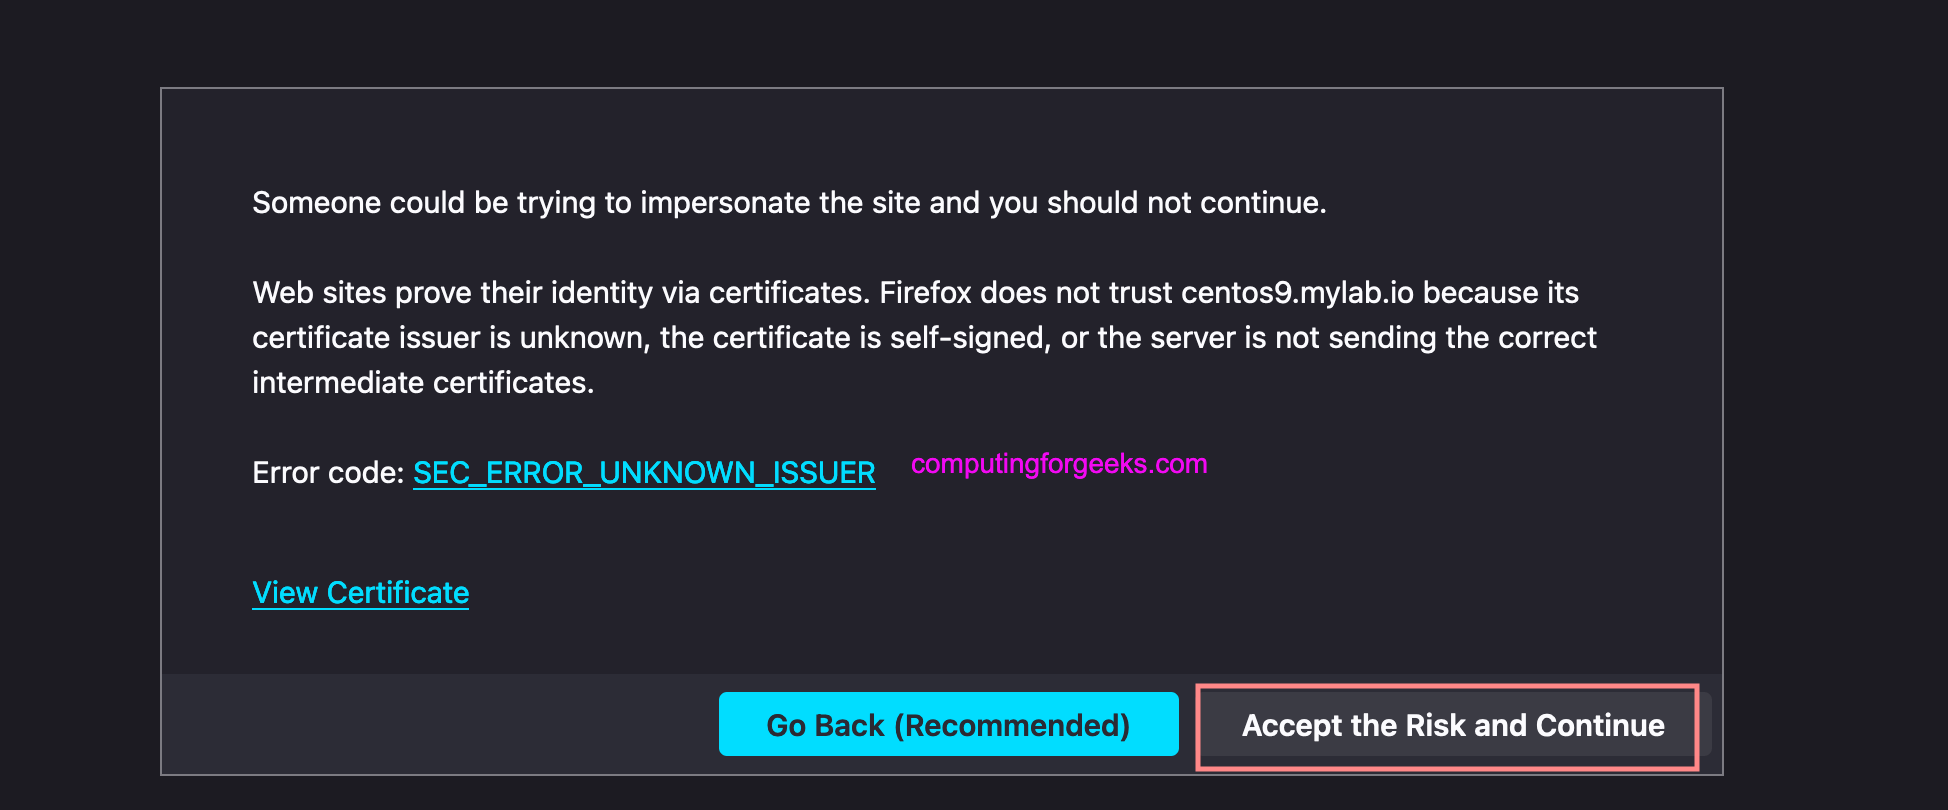
IP FQDN要在网络浏览器上访问 oVirt Engine,请使用https://manager-fqdn/ovirt-engine。忽略 SSL 证书风险警告。
您可以在以下 URL 获取证书颁发机构的证书。将
http://<manager-fqdn>/ovirt-engine/services/pki-resource?resource=ca-certificate&format=X509-PEM-CA请参阅在浏览器上配置 oVirt/RHEV Manager 证书安全性
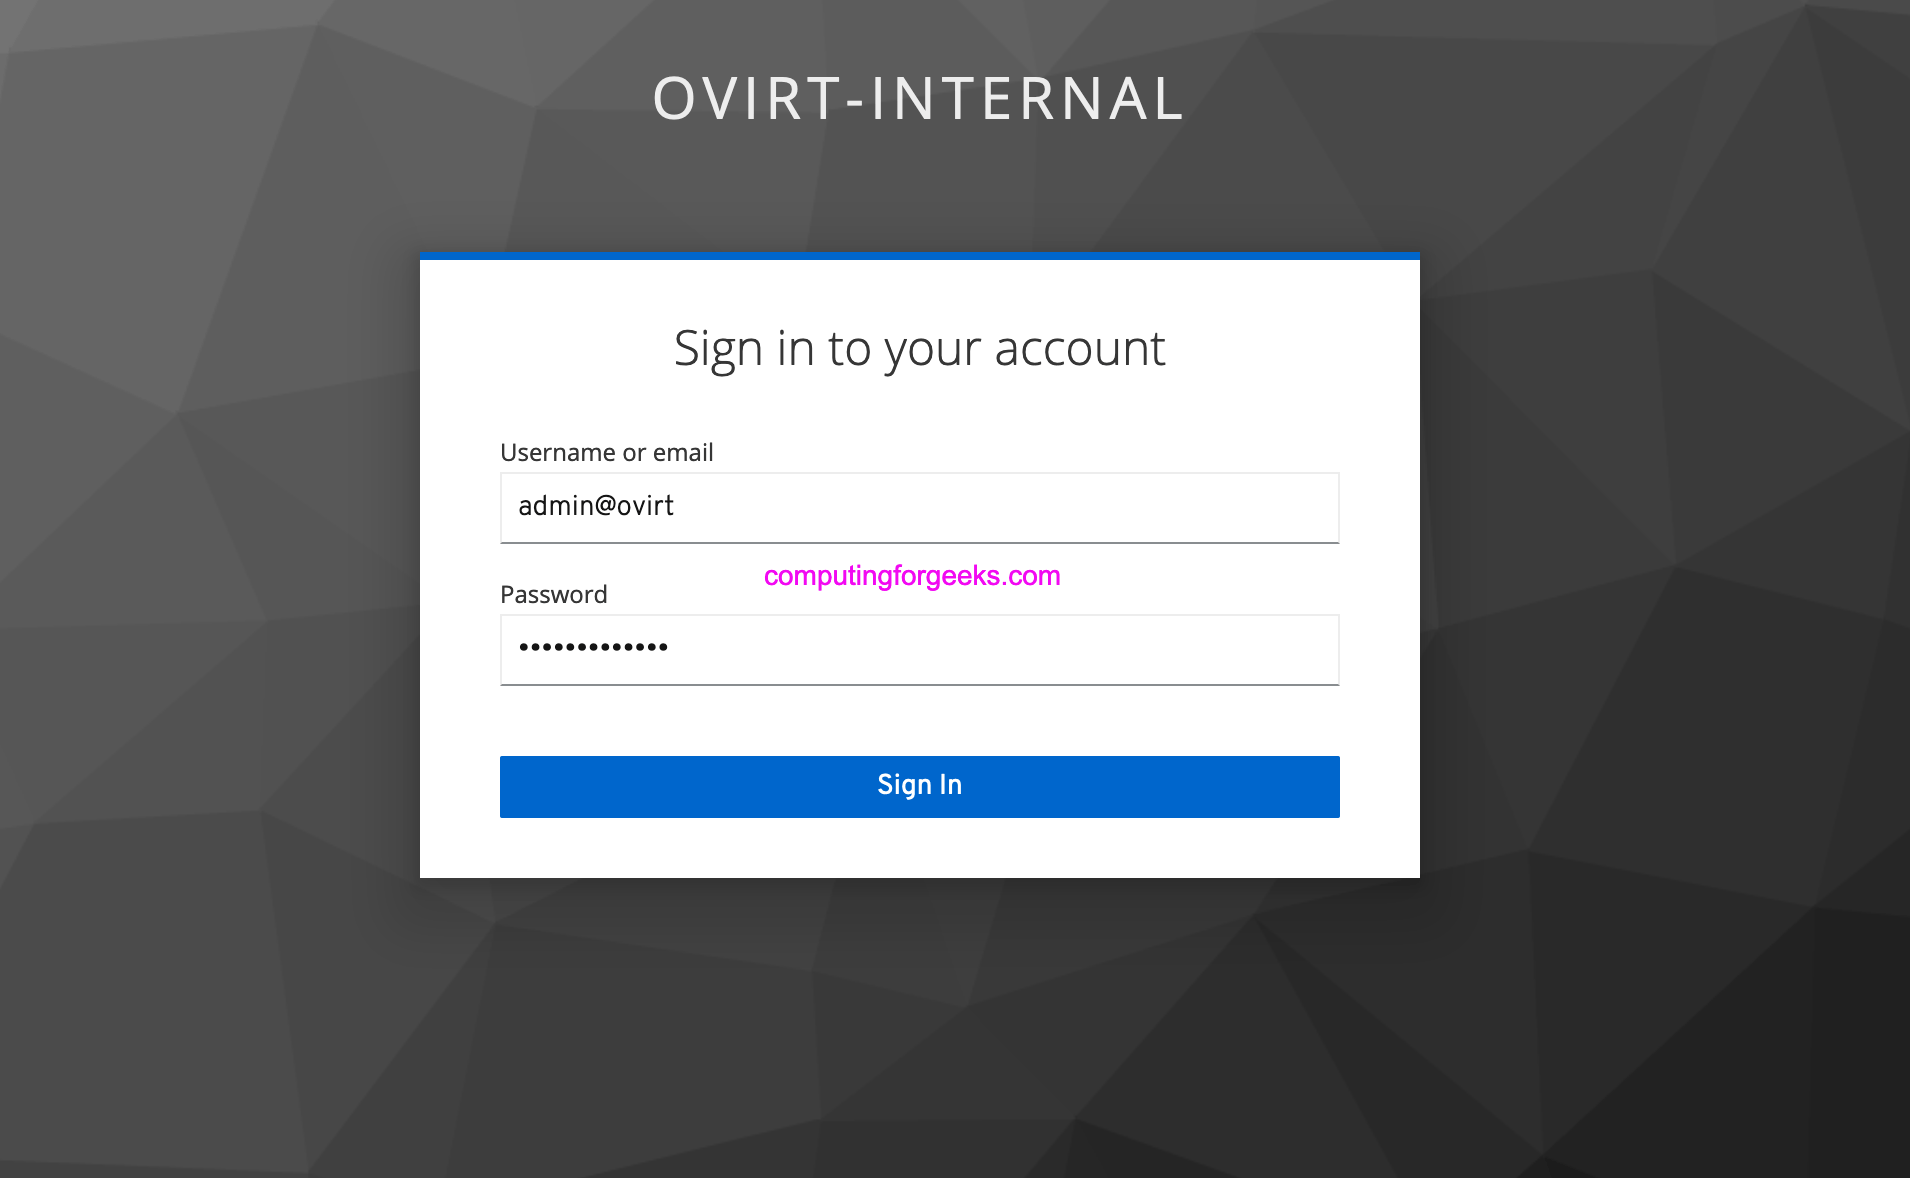
要访问管理面板,请使用“门户”下的“管理门户”
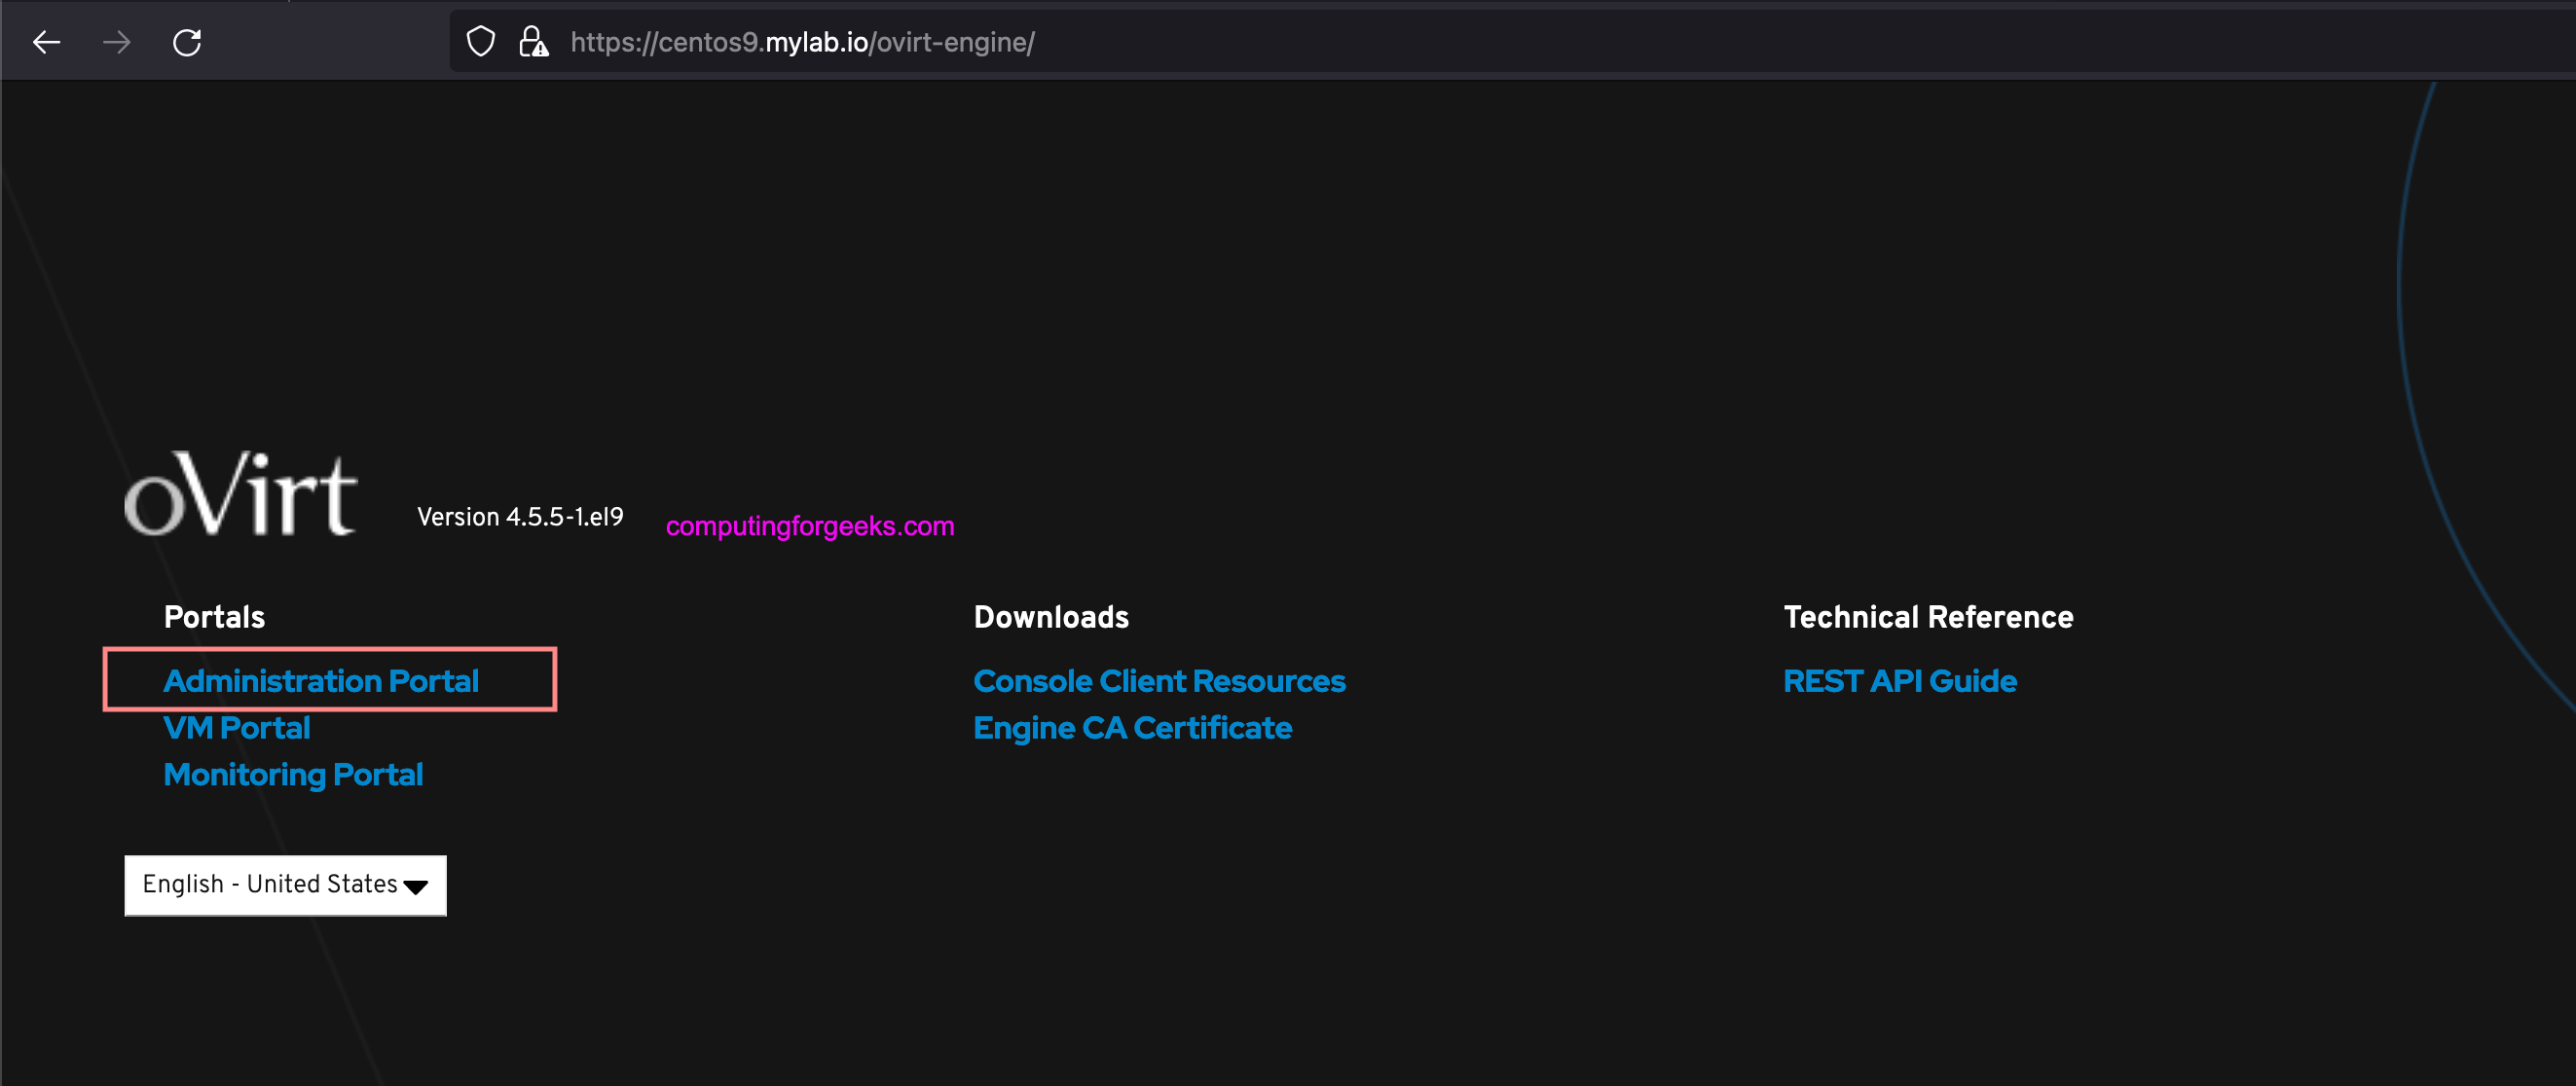
使用创建的管理员用户帐户登录。
- 用户名:admin@ovirt
- 密码:使用您在安装过程中指定的密码。
您可以添加备用主机名或 IP 地址以访问管理门户。
$ sudo vim /etc/ovirt-engine/engine.conf.d/99-custom-sso-setup.conf
SSO_ALTERNATE_ENGINE_FQDNS="_alias1.example.com alias2.example.com_"
备用主机名列表需要用空格分隔。您还可以将引擎的 IP 地址添加到列表中,但不建议使用 IP 地址而不是 DNS 可解析的主机名。
要添加计算节点,请使用:
- 在 CentOS Stream 9/Rocky 9 上安装 oVirt 计算节点
7. 访问 Grafana 仪表板
Grafana 网络仪表板位于 https://manager-fqdn/ovirt-engine-grafana/

使用admin用户和您在安装过程中指定的密码登录。
接下来要阅读的有关 oVirt 管理的文章:
- 将 NFS 数据、ISO 和导出存储域添加到 oVirt/RHEV
- 在 oVirt/RHEV 中创建虚拟机和存储逻辑网络
- 使用 FreeIPA LDAP 配置 oVirt/RHEV 用户身份验证
- 如何在 oVirt/RHEV 中创建数据中心和集群
- 在 oVirt/RHEV 存储域上上传和使用 ISO 映像
- 如何将计算主机添加到oVirt虚拟化
- 如何使用 Terraform 在 oVirt/RHEV 上配置虚拟机

为您推荐